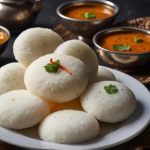
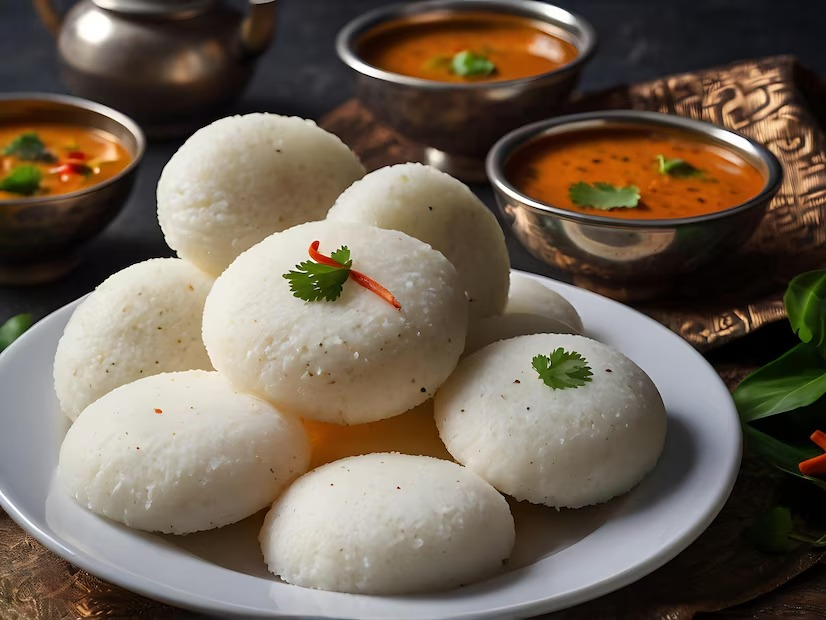
If you’re a fan of Indian cuisine, you’re probably familiar with idli, the soft, fluffy, and savory steamed rice cakes that have won hearts worldwide. Originating from South India, idli is a staple breakfast dish that is enjoyed with coconut chutney, sambar, or a variety of other side dishes. What makes idli so beloved is not only its comforting taste but also its healthy composition. Made from fermented rice and lentils, it’s a nutritious and gluten-free option for anyone seeking a light yet filling meal.
In this blog post, I’ll take you through a detailed step-by-step guide on how to make perfect, fluffy idlis at home, along with some tips to get the batter just right. Whether you’re a seasoned cook or a beginner, this recipe will help you master the art of idli-making.
Why Idli is a Breakfast Favorite
Before we dive into the recipe, let’s quickly explore why idli holds a special place in the hearts of many:
- Nutritious: Idli is made using rice and urad dal (black lentils), both of which provide essential nutrients. The fermentation process increases its digestibility and enhances its probiotic properties, making it gut-friendly.
- Light and Filling: Despite being light on the stomach, idlis are filling and keep you energised for hours.
- Gluten-Free: For those with gluten sensitivities or celiac disease, idli is a great alternative to wheat-based breakfast foods.
- Low-Calorie: One idli contains around 40-50 calories, making it a low-calorie meal, perfect for anyone looking to maintain a balanced diet.
- Versatile: Idlis can be paired with a variety of chutneys, sambar, or even podi (a spiced lentil powder), making them adaptable to different tastes.
—
Ingredients for Idli
To prepare soft, fluffy idlis, you’ll need just a few ingredients:
For the Idli Batter:
– 2 cups rice (preferably parboiled or idli rice)
– 1 cup urad dal (split black lentils without skin)
– 1 tsp fenugreek seeds (optional) – helps in fermentation and adds flavor
– Salt to taste
– Water as required – for grinding the batter and adjusting the consistency
For Steaming:
– Idli moulds
– Oil or ghee (for greasing the molds)
—
Step-by-Step Guide to Making Idli
1. Soaking the Rice and Dal
The first step to preparing fluffy idlis is soaking the ingredients properly.
– Rinse the rice thoroughly in water until the water runs clear. Soak the rice in water for about 4-6 hours.
– Rinse the urad dal and fenugreek seeds (if using) together and soak them separately from the rice for about the same time, 4-6 hours.
Tip: Soaking is important to soften the grains and lentils, ensuring they grind smoothly into a batter.
2. Grinding the Batter
Once your rice and dal have soaked long enough, it’s time to grind them into a batter. You can use a wet grinder (traditional method) or a high-powered blender.
– Grind the urad dal first: Drain the soaked urad dal and grind it with just a little water until you get a smooth, fluffy batter. The batter should have a light and airy consistency. Transfer it to a large mixing bowl.
– Grind the rice: Drain the soaked rice and grind it into a slightly coarse batter. The texture should resemble fine semolina (rava). Add a small amount of water to achieve this texture.
– Mix the batters: Combine both batters in the large mixing bowl. Mix them well, ensuring no lumps remain. The combined batter should have a thick yet flowing consistency.
3. Fermentation
Fermentation is a crucial step in making idlis as it helps the batter rise, making the idlis soft and fluffy.
– Add salt to the batter and mix gently.
– Cover the batter with a lid and leave it in a warm place for 8-12 hours or overnight to ferment. The fermentation time can vary depending on the weather. In warm climates, the batter ferments faster, while in colder climates, it may take longer.
– After fermentation, the batter should have doubled in volume and appear bubbly. This is a good sign that the batter is ready for steaming.
4. Steaming the Idlis
Now that the batter has fermented, it’s time to steam the idlis.
– Grease the idli moulds with a little oil or ghee to prevent the idlis from sticking.
– Pour the batter into the molds, filling each mold about three-quarters full to give the idlis space to rise.
– Steam the idlis in an idli steamer or pressure cooker (without the weight) for 10-15 minutes on medium heat.
Tip: To check if the idlis are done, insert a toothpick or knife into one. If it comes out clean, the idlis are ready!
—
Serving Suggestions for Idli
Idlis are typically served with coconut chutney and sambar, but there are many variations you can try. Here are a few popular options:
- Coconut Chutney: A blend of fresh coconut, green chilies, and tempered mustard seeds. This is the classic accompaniment.
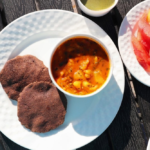
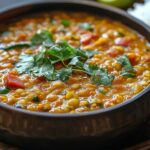
- Sambar: A flavorful lentil-based vegetable stew that adds spice and richness to the soft idlis.
- Tomato Chutney: A tangy chutney made from tomatoes, onions, and spices.
- Podi: A spiced lentil powder, often mixed with sesame oil or ghee, that’s sprinkled over idlis for an extra kick.
—
Tips for Making Perfect Idlis
- Choose the right rice: Idli rice or parboiled rice works best for soft idlis. Using regular rice may not give the same fluffy texture.
- Consistency of batter: The batter should not be too thick or too thin. It should have a pourable consistency similar to pancake batter.
- Proper fermentation: Fermentation is key for soft idlis. In colder weather, place the batter in a warm spot, or inside an oven with the light turned on to aid fermentation.
- Don’t over-steam: Over-steaming can make idlis hard. Stick to the 10-15 minute steaming time and always check with a toothpick.
- Use fresh batter: While fermented batter can be stored in the fridge, idlis are fluffiest when made with freshly fermented batter.
—
Wrapping Up
Making idli at home is a simple yet satisfying process. With the right ingredients, a bit of patience, and attention to detail, you can enjoy soft, fluffy idlis any time you want. Plus, the versatility of idli allows you to pair it with a variety of side dishes, making it a perfect meal for breakfast, lunch, or even dinner. Give this recipe a try and enjoy the authentic taste of South Indian cuisine from the comfort of your kitchen!
Whether you’re a seasoned cook or just starting, this idli recipe is bound to become a go-to favorite in your household.
Happy cooking!
View More Recipe:- LUCKNOW REMIX